2018年05月13日
《その383》時計の秒針(1)
時計の秒針(1)
今回と次回で、秒を刻む時計の秒針を作成してみます。長針と短針も、これとまったく同様にして作成できますから、すべての針を重ね合わせれることで時計を完成させることも可能です。
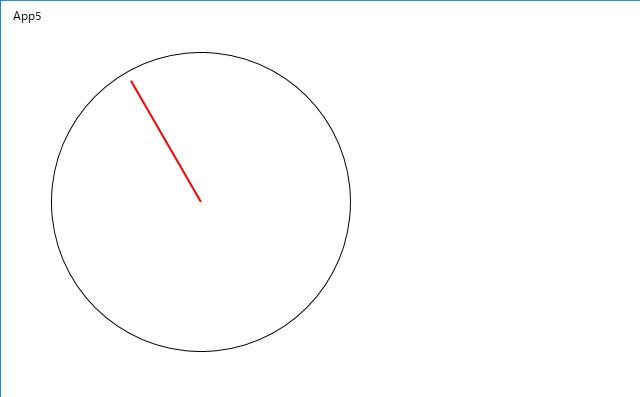
前回《381》と前々回《382》の方法で、円と直線を用意します。
円は canvas1上、直線は canvas2上です。
次回に、この直線が秒針として秒を刻むように改造します。
下の画像の秒針は 55秒の位置になっています(下記の MainPage.xaml.cpp をご覧ください)。

以下は、MainPage.xaml.cpp です。
//
// MainPage.xaml.cpp
// MainPage クラスの実装。
//

#include "pch.h"
#include "MainPage.xaml.h"

using namespace App5;

using namespace Platform;
using namespace Windows::Foundation;
using namespace Windows::Foundation::Collections;
using namespace Windows::UI::Xaml;
using namespace Windows::UI::Xaml::Controls;
using namespace Windows::UI::Xaml::Controls::Primitives;
using namespace Windows::UI::Xaml::Data;
using namespace Windows::UI::Xaml::Input;
using namespace Windows::UI::Xaml::Media;
using namespace Windows::UI::Xaml::Navigation;


float pi = (float)3.1416;
int s = 0;              // 秒
float len_s = 140;      // 秒針の長さ

// 秒針先端の x座標
float x01 = 150;

// 秒針先端の y座標
float y01 = 10;


MainPage::MainPage()
{
    InitializeComponent();

    // 外側の円
    Shapes::Ellipse^ circle;
    circle = ref new Shapes::Ellipse();
    circle->Width = 300;
    circle->Height = 300;
    circle->Stroke
        = ref new SolidColorBrush(Windows::UI::Colors::Black);
    circle->StrokeThickness = 1;
    canvas1->Children->Append(circle);

    // Canvas の位置
    canvas1->Margin = Thickness(50, 20, 0, 0);
    canvas2->Margin = Thickness(50, 20, 0, 0);


    // 今回は とりあえず、秒針を 55秒の位置にします。
    //       次回に、秒針が時を刻むように改造します。
    s = 55;
    x01 = 150 + len_s * cos((90 - 6 * s) * pi / 180);
    y01 = 150 - len_s * sin((90 - 6 * s) * pi / 180);
    f();
}


// 秒針の描画
void MainPage::f() {
    // 秒針
    auto line = ref new Shapes::Line();
    line->Stroke
        = ref new SolidColorBrush(Windows::UI::Colors::Red);
    line->StrokeThickness = 2;
    line->X1 = x01;
    line->Y1 = y01;
    line->X2 = 150;
    line->Y2 = 150;
    canvas2->Children->Append(line);
}
この記事へのコメント
コメントを書く
この記事へのトラックバックURL
https://fanblogs.jp/tb/7652371
※ブログオーナーが承認したトラックバックのみ表示されます。
この記事へのトラックバック

